The Vegan Cheat Sheet
  • Home
  • Book
  • Authors
  • Tips
  • Events
  • Blog
  • Press
  • Contact

HAVE A BALL!

6/4/2014

0 Comments

 
While exhibiting with my yogi friend, Robin, at a wellness-center opening in Avon-by-the-Sea (NJ) on Saturday, I tested one of Robin’s homemade peanut butter balls. Then I had another. And another.

Those luscious little orbs were stuffed with goodies, like coconut, pumpkin seeds, chocolate chips, butterscotch chips, chia seeds, and sunflower seeds, giving them a tantalizing crunch. Best of all, they were vegan (and addicting).

I had to ask for the recipe—and now I have to share it with you.

ROBIN’S OUTRAGEOUS PEANUT BUTTER BALLS
Makes 20 to 25 balls

1 cup dry oatmeal
2/3 cup coconut—sweet or toasted
½ cup ground flax or wheat germ
½ cup cacao nibs or chocolate chips
1/3 cup honey or maple syrup
1 tablespoon chia seeds
1 teaspoon vanilla

OPTIONAL ADD-INS: walnuts, pecans, butterscotch chips, sunflower seeds, raisins, dried cranberries, dried cherries, etc.
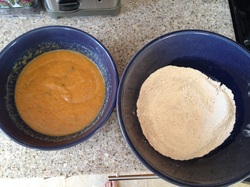
  • Mix thoroughly, cover, and chill for a half hour.
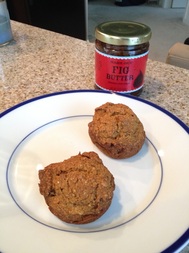
  • Roll balls and place in airtight container in fridge (they’ll keep for up to a week).

0 Comments

Power Up!

3/25/2014

0 Comments


Former Super Mario Bros. addict Erin Gahagan finds a healthy new way to ignite her super powers.

It’s a little-known fact that the summer before sixth grade, I was a die-hard gamer. From sunup to sundown, you could find me in the basement, sitting on a ‘70s-relic rust-colored shag floor pillow, adeptly navigating the levels of my new obsession: Super Mario Bros. 3. While I’d enjoyed its predecessors in Nintendo’s Super Mario Bros. cannon, I adored Super Mario Bros. 3 to an unhealthy extent.

The good news is, I got older and ceased spending my summers in front of a console in a damp basement. But that doesn’t mean I forgot my Super Mario Bros. fantasy: Wouldn’t it be totally awesome if power-ups were real? I mean, pop a Super Mushroom and you can break bricks! Scarf down a Super Leaf and you can fly!
Vegan Cheat Sheet Power Muffins
Ok, so breaking bricks and flying might be bold goals best left to SMB3 (that’s what we gamers call it). The gals behind The Vegan Cheat Sheet have, however, discovered a real-life power-up they call Power Muffins (page 166; recipe below).

While they won’t make you fly, they will fill you with energy-boosting ingredients that’ll carry you through the day.  Which is a pretty good superpower in itself!

Vegan Cheat Sheet Power Muffins
First things first: These muffins require a lot of ingredients, but most are staples you probably already have on hand. Those you may have to seek out are chia seeds, flaxseeds, and wheat germ.

Now I know these items are super healthy—but I have no idea why. So I quickly checked in with Dr. Oz (via doctoroz.com; regrettably, I don’t actually know the good doctor) and found:

Chia Seeds—nutritional benefits include fiber, omega fatty acids, calcium, antioxidants, and protein, among other things. The advantage of chia over flaxseeds is that chia seeds don’t need to be ground to reap the health benefits..

Flax Seeds—great source of fiber; plant source of omega-3 fatty acids (which our body doesn’t make naturally, yet helps immensely with our anti-inflammatory system); contain lingans, purported to reduce the risk of some cancers.

Wheat Germ— the most vitamin- and mineral-rich part of the wheat kernel; packed with B vitamins, fiber, phytosterols (which promote good cholesterol), healthy fatty acids, minerals, and vitamin E.
Vegan Cheat Sheet Power Muffins
Sounds good to me!  The muffins I’m used to, after all, are pretty much butter and oil and God knows what else. This is definitely a health upgrade!

The Power Muffins are simple to whip up—mix together the dry ingredients, mix the wet ingredients, then combine and dole out into a muffin pan.

Vegan Cheat Sheet Power Muffins
The end result? A super-healthy breakfast or snack, at home or on-the-go. The recipe makes 18 muffins, and they keep really well, so you’ll be set for a week. They’re a blank canvas for adding your own twists, too.

Vegan Cheat Sheet Power Muffins
I have an insane sweet tooth, so my trick is to add Trader Joe’s Fig Butter to a warm muffin (have you tried Trader Joe’s Fig Butter? If not, stop reading and go buy some. I could write an entire post on its genius. It’s not actually butter, by the way—more of a jam).

So while Power Muffins may not give me the ability to shoot fireballs or evade my enemies by turning into a statue, they’re a pretty fabulous energy-boosting treat.  Especially when I eat them while wearing overalls and a red “M” hat.


Power Muffins
makes 18 muffins

Picture
1 tablespoon chia seeds
2 tablespoons wheat germ
1-½ cups white whole-wheat flour or whole-wheat pastry flour
2 teaspoons baking soda
½ teaspoon salt
½ teaspoon ground cinnamon
¼ teaspoon nutmeg
1 cup canned pumpkin (not pumpkin pie filling)
½ cup applesauce
½ cup pure maple syrup
½ cup almond milk
½ cup raisins
2 tablespoons ground flaxseed or flaxseed meal mixed with 6 tablespoons warm water; let sit for 10 minutes

Preheat oven to 350°.
  1. In a large bowl, toss together chia seeds, wheat germ, flour, baking soda, salt, cinnamon, and nutmeg.
  2. In a separate bowl, mix remaining ingredients and add to flour mixture. Mix until well blended.
  3. Pour in nonstick muffin pan (or line muffin pan with paper cup liners) and bake for 30 minutes. Cool and serve.


0 Comments

Easy, Delicious, OIL-FREE Chocolate Cake

2/14/2014

0 Comments


Happy Valentine's Day! Here, our love letter to chocolate.

Vegan Chocolate Cake
Serves 10 to 12

1-1/2 C flour
3/4 C sugar
1/4 C cocoa powder
1 t baking soda
1/2 t salt
1 C water
1/2 C applesauce
2 t vanilla extract
2 t balsamic vinegar
1/4 C powdered sugar
Strawberries (optional)

Preheat oven to 350.
  1. Line a 9-inch round cake pan with wax paper.
  2. In a mixing bowl, sift together flour, sugar, cocoa powder, baking soda, and salt. Add water, applesauce, vanilla, and vinegar and mix thoroughly.
  3. Pour into cake pan and bake 30 to 35 minutes. Cool well and sprinkle with powdered sugar, and if desired, sliced strawberries.
Note: To make a layer cake, double the recipe and bake two cakes. When cool, place strawberries between the layers.


0 Comments

My Squashy Valentine

2/13/2014

0 Comments


Move over, fiancé. For budding chef Erin Gahagan, there's a new crush in town.

Love is in the air, and this year I have a brand-new apple of my eye (apologies to my fiancé). My new crush? Spaghetti squash. How have I been living life—totally unaware of its existence—for this long?  
PictureErin's new love: the spaghetti squash
While out to dinner last month, I noticed an Italian-inspired dish made with “spaghetti squash” on the menu. Wow, I thought, that is brilliant. Make the “noodles” out of squash instead of carb-laden pasta, and your dinner instantly gets healthier. So I ordered it, loved it, and lamented the fact that I didn’t own whatever fancy gadget I assumed I needed to make spaghetti squash at home.

A couple weeks later, I was thinking about that glorious meal (so I enjoy mentally reliving meals, ok?) and decided to see just how much it would cost me to obtain the necessary equipment . That’s when Google gave me the shock of my life.

“Spaghetti squash” does not refer to a method of cutting squash, as I’d assumed.  Rather, it is the name of specific type of squash that makes the “noodles” within itself simply by being cooked.
Picture
The instructions popping up in every search result told me all I had to do was purchase this mythical “spaghetti squash” at the grocery store, cut it in half, clean out the seeds, and then put it in the oven for 30 to 45 minutes. After that, the squash’s insides would simply fall out into noodle-like strands. 

I thought for sure I was reading it wrong. Nothing this healthy and delicious could possibly be so easy. But link after link assured me that, in fact, it was that easy.

Obviously I immediately rushed to the grocery store and purchased two large spaghetti squash. They were pretty big and heavy, and therefore a semi-pricey produce purchase, but I was willing to risk it for the chance this might actually work.

PictureSeedy process
I cut both squash in half, pulled out the seeds (much like you would when carving a pumpkin), dusted the four halves with olive oil, salt, and pepper, and placed them face down on foil-lined cookie sheets. Then into the oven they went –450 degrees for 40 minutes—followed by a painful (for impatient ol’ me) 5- to 10-minute cool-down period. It worked! It actually worked!


Picture
Into the oven ...
PictureScrape with a fork or spoon
I was gleeful as I scraped at the innards with a spoon and they just fell out, into the promised spaghetti-like strands, straight into my bowl. Literally everything comes out of these suckers, straight down to the skin. There is no waste! The strands just kept pouring out. And out, and out. Those two squash yielded so many “noodles” I could’ve hosted my own spaghetti (squash) dinner. So, memo to file, one spaghetti squash is definitely enough to feed two people.


PictureTop with marinara sauce
Topped with some marinara sauce, this was a real treat of a meal. I felt like I unlocked some high-level secret and pretty much didn’t stop talking (and Tweeting and writing) about it for days.

Of course, as it turns out, much of the world is already aware of this genius fruit (while hotly debated on the Internet, it seems spaghetti squash is technically a fruit). The masterminds behind The Vegan Cheat Sheet were on to its glories long before the great Gahagan Squash Revelation of 2014. In their “Sauce on Top” recipe section (page 126), they suggest spaghetti squash as a go-to base and offer recipes for seven amazing-looking sauces to pair it with.

Hmmm, seven sauces. . .now I can continue my love affair every single day of the week.  Happy Valentine’s Day!

Share your food crushes with Erin on Twitter, @erin1217.


0 Comments

COMFORT FOOD: YOUR WINTER-SURVIVAL SOLUTION

2/3/2014

0 Comments


While she pines for spring, guest blogger Erin Gahagan finds a way to survive an extra-rough winter.

Polar vortex? More like pasta vortex. What is it about ludicrously cold temperatures that makes me want to carbo-load? If I’m expected to function in icy, subzero temperatures, you better believe I’m going to do it fueled by comfort food. Now, if only there was a way to do this healthfully. . .
Picture
Aha! I know. I’m going to pull out The Vegan Cheat Sheet and make the coziest recipe I can find. Hmm, where is that book? I haven’t seen it since December, when my diet switched over to cookies, pies, candy, and wine for the better part of a month.

Once I’d located the poor neglected book and dusted off the candy-cane residue, I hit the recipe jackpot: Baked Ziti/Spaghetti Pie (page 109; see recipe below). Pasta prepared in casserole form? My carb dreams have come true!

Picture
The first attractive thing about this recipe is that it requires only six ingredients, one of those being my treasured nutritional yeast (check out my November 1, 2013 post on the great Stuffed Portobello Mushroom adventure).

The second is that the recipe is clearly written and easy to follow, truly the thing I appreciate most about this book's No-Brainer Recipes.

Picture
Step one: Blend spinach, tofu, and salt together into a creamy mixture. The recipe says to “blend with an immersion blender, blender, or food processor. . .or whisk with a fork.” I don’t know what an immersion blender is* (although I‘m intrigued), and I don’t own a food processor, so this left me with the blender option. I threw the ingredients in and gave it a whirl. This was not a resounding success; since I don't have a terribly powerful blender, half of it cooperated and the other half just refused.

Picture
But, being the flexible cook I am (ok, I nearly choked writing that—I can’t stand it when Plan A doesn’t work, but it was fun to pretend for a second), I cut my losses and moved on to the “whisk with a fork” option. Worked like a charm.

Sidebar: The spinach/tofu mixture above tastes amazingly delicious on its own. It’s so rich and creamy! I almost felt like I was eating cheese (and you know how I feel about cheese). I want to mix up a big container and use it for everything! Bagel spread, sandwich filling, party dip—the possibilities are endless.

Picture
Back to the Baked Ziti/Spaghetti Pie. Once the spinach/tofu mixture was all set, I mixed it with cooked whole-wheat rigatoni (you can use any type of whole-wheat pasta) and a jar of marinara sauce in a casserole dish. Top that with nutritional yeast, pop it in the oven for 15 minutes, and it’s done!

Picture
The end result? Mouthwatering, cozy comfort food—the perfect antidote to the latest blizzard outside.

However, Mother Nature? Even though I’ve discovered a delicious way to survive winter, that doesn’t mean I wouldn’t welcome an early spring. Just saying.


Bond with Erin over comfort food on Twitter at @Erin1217.

Picture
*Editor's note: An immersion blender (also called a stick, wand, or hand blender) is a longtime staple of restaurant kitchens. It allows you to quickly blend ingredients directly in their vessel (bowl, pot, pan, etc.).

Baked Ziti/Spaghetti Pie
Serves 4

1 (14-ounce) box silken light tofu, drained
1 pound fresh baby spinach, steamed to wilt, and squeezed to remove excess water (or frozen, defrosted and squeezed)
2 teaspoons salt
1 (1-pound) box whole-wheat pasta, cooked al dente
1 (25-ounce) jar oil-free marinara
2 tablespoons nutritional yeast

Preheat oven to 425 degrees.

  1. In a medium bowl, blend tofu, spinach, and salt with an immersion blender, blender, or food processor until creamy, or whisk with a fork.
  2. In a 9 x 13-inch lasagna pan, mix pasta with tofu-spinach blend and sauce. Top with nutritional yeast.
  3. Bake uncovered for 15 minutes. Remove from oven and serve hot.
0 Comments

The Nuts and Bolts of Nutritional Yeast

12/13/2013

0 Comments


What the heck is nutritional yeast? Food writer and holistic health counselor Melissa Beveridge explains—and declares her love for this flaky vegan staple.

I had the pleasure of being introduced to Lisa McComsey, co-author of The Vegan Cheat Sheet, at a health event in November. Lucky for me, we immediately bonded over our love of writing and food. True confession: I’m not a vegan. But before you write me off, hear me out: I’m a dedicated holistic health counselor, avid foodie, and food writer. I love food. I love all food, including vegan food, and I want to share vegan cuisine with my fellow foodies—no matter what their gastronomic persuasion. 

My professions as holistic health counselor and food writer keep me current on the various diets, cuisines, fads, and cultural ingredients. One of my favorite local restaurants, From Seed To Sprout in Avon-by-the Sea, NJ, serves vegan cuisine. When I bring my non-vegan friends there, they don’t realize it’s vegan until I tell them. They love it—and are usually shocked at how good the food is, because they think vegan food is “blah.” I’m here to change that thought and show people that vegan food is delicious. 
Picture
Now for the “meat” of this post: Nutritional yeast. Vegan readers, you've likely eaten it or stock it in your pantry. For those who haven’t heard of it, you’re in for a treat! This vegan staple is a yeast that’s grown mostly on beet sugar, deactivated by heat, and then crumbled for your enjoyment. (It comes in flake and powder form). Because it’s an inactive yeast, you can add it to many dishes that active yeasts can’t handle. Often used as a cheese-flavoring substitute in vegan cooking , nutritional yeast has a nutty, cheesy taste. I’m telling you, it’s absolutely delicious. One of my favorite ways to enjoy it is sprinkled over vegan mac and cheese.

Health bonus: Nutritional yeast is an excellent source of protein, containing essential amino acids and B-complex vitamins. For all those vegetarians out there, it's an excellent (vegetarian source) of vitamin B-12. This critical nutrient helps produce red blood cells and provides protective insulation around your nerves. Vegetarians have a hard time getting enough B-12 in their diets, because it comes primarily from animal products. But one tablespoon of nutritional yeast gives you a full day’s worth of this vitamin!

Nutritional yeast also contains 9 grams of protein (that’s more than one egg’s worth!) and 4 grams of fiber. Optimal gut health requires that you have enough fiber in your system to keep your digestive track, well, on track. Fiber also regulates your blood sugar.

If that’s not enough, nutritional yeast is also a great source of folic acid. Whether you’re pregnant (or planning to be), or just trying to eat healthfully, your body needs folic acid, which prevents major birth defects and plays a critical role in cell maintenance and production. Oh, and did I mention this nutritional powerhouse is also gluten free? What’s not to love?

If you haven’t yet added nutritional yeast to your diet, try it out in your next recipe—vegan or not! If I’ve intrigued you, there are some great recipes to try in The Vegan Cheat Sheet, including Alfredo Sauce (recipe below), Eggplant “Parmesan,” and Mushroom Risotto, which all feature nutritional yeast.

Picture

Learn more about Melissa, her passion for food, and how she rubbed elbows with Martha Stewart by visiting MBEEWELL.


ALFREDO SAUCE
Serves 4

¾ cup raw cashews
¾ cup water
3–4 cloves garlic, minced
4 tablespoons nutritional yeast
1 teaspoon salt
Black pepper, to taste
¼ cup to 1 cup water

  1. In a blender or food processor, purée cashews and water until smooth
  2. In a heavy dry pan, cook garlic over low heat for 3 minutes. Add cashew cream, nutritional yeast, salt, pepper, and ¼ cup water.
  3. Heat thoroughly, adding more water if sauce is too thick. Toss with pasta of choice and serve immediately.

0 Comments

Vegan Fat-Free, Oil-Free Stuffing (you won't miss the butter)

12/9/2013

0 Comments

 
Get your stuffing on this holiday with Amy’s veganized version of our fave side dish. It’s moist, flavorful, and super-easy to make. Watch Amy in action in this quick video, then try it for yourself. Recipe below.

Amy's Amazing Stuffing Recipe

1 tablespoon ground flaxseed mixed with 3 tablespoons hot water
1 cup chopped onion
1 cup chopped celery
5 cups cubed whole-wheat toast or stuffing mix
3–4 cups veggie stock
Salt, pepper, and herbs to taste

  1. Mix flax in warm water and set aside.
  2. Sauté onions and celery in dry pan on medium heat. If ingredients begin to stick, add 1/4 cup veggie stock to deglaze pan.
  3. When onions begin to brown, add bread cubes or stuffing mix.
  4. Add stock 1 cup at a time until it reaches desired consistency. Stir in salt, pepper, herbs, and flaxseed mixture. Enjoy immediately or heat in oven in casserole to serve later.

0 Comments

Amy's Perfect Mashed Potatoes (did we mention they're vegan?)

11/23/2013

0 Comments

 
Okay, we can live with the no-turkey thing. But what's Thanksgiving without mounds of fluffy mashed potatoes? Amy's version is easy to make, fat free, and delicious. Here she demos how to whip up a quick batch. Recipe follows.

Perfect Mashed Potatoes (p 125)
Serves 4 to 6 as side dish

4 Idaho potatoes, peeled and chopped
1/2 cup (approximately) unsweetened plain almond milk
Salt and black pepper, to taste 

  1. Boil or microwave potatoes (covered with water, 5-minute increments) until very tender, then drain
  2. With a hand mixer, whip potatoes until no chunks remain (rub through fingers to test)
  3. Slowly add almond milk, 2 tablespoons at a time, until desired moisture is achieved. Add salt and pepper to taste.
0 Comments

FIT TO BE THAI-ED

11/21/2013

0 Comments


As she withdraws from takeout addiction, guest blogger 
Erin Gahagan overcomes a kitchen tantrum to master Pad Thai.

Seven weeks. 49 days. 1,176 hours. That’s how long it’s been since I left New York City for Pennsylvania. In that time, I’ve ordered delivery exactly twice. This is about 10 percent of what I would’ve ordered in New York over that same time period.

That’s good, right? Good for my health, my wallet, and building-my-life skills (see previous post re: onion). But boy, do I miss delivery. Ordering out meant yummy food with zero prep and practically no cleanup—everything a (not-so) secretly lazy girl like me needs. Ah, those were the days.

But back to Reality, PA. Last week, I was so mad about cooking dinner that I stomped around the kitchen like a toddler, slamming cabinets and clanging pans. I was tired, hungry, and the recipe I’d picked—not from The Vegan Cheat Sheet—turned out to be way more complicated than I’d thought. In the end, I didn’t even want to eat it, because all I could taste was fury.

A few days later, sanity restored, I revisited The Vegan Cheat Sheet’s No-Brainer Recipes. Then I saw it. . .Pad Thai—one of the items I missed ordering the most—and two marvelous words in the description: “super-simple.” I wept with joy (ok, that’s not true, but I felt like it).
Picture
I recognized the ingredients, and all were easy to find at the grocery store. Full disclosure: Still smarting from the last dinner debacle, I cut a few corners here. I used pre-minced garlic and frozen broccoli. I was heavy with guilt over this until my fiancé pointed out there’s no shame in opting for convenience once in awhile. It’s a good point. While fresh is definitely best, sometimes it’s ok to make things easier on yourself. I’m slowly learning that teaching myself to cook is a marathon, not a sprint—pacing is important to avoid going down in a blaze of frustration.

Picture
This Pad Thai recipe could not have been easier. Cook the noodles in one pan, mix and simmer the sauce ingredients in another, and microwave the broccoli. Mix together in a serving bowl and it’s done! I am not downplaying it when I say this meal truly takes under 10 minutes to make. That’s less time than it would take to get it delivered! And unlike delivery, I knew there was no oil or other bad stuff mixed in.

The simplicity and healthfulness of the recipe is great, but the even better news is that it tastes unbelievable. My fiancé inhaled his bowl, saying, “This feels like a treat—like something you’d order.” In more good news, since this recipe makes four servings, we had leftovers, which I enjoyed even more the next day.

Picture
Obviously, this Pad Thai is my new favorite thing (easy, delicious, and tastes like takeout? Let’s have this every night!). So I quickly found myself back at the store, buying ingredients to make it again. The checkout girl saw the rice noodles and asked what I used them for.

“Pad Thai!” I exclaimed, thrilled that I actually had a good answer.

“Really?” she said, “I’ve had that in restaurants but I didn’t know you could make it at home.”

“Oh yes, it’s super easy!” I heard myself say, like I’d been doing this for years. Fake it ‘til you make it, right?

Pad Thai (p 106)
Serves 4

2–3 tablespoons packed sugar
3 tablespoons fresh lime juice
4 tablespoons tamari or soy sauce
3 cloves garlic, minced
3 green onions, chopped
1 (16-ounce) package Thai rice noodles, cooked according to package instructions
3 cups broccoli florets, steamed in microwave for 2–4 minutes
¼ cup fresh cilantro
¼ cup chopped peanuts or other nuts (optional)
Picture
In a large saucepan, combine sugar, lime juice, tamari, garlic, and scallions and simmer over medium heat for 5 minutes

Toss noodles with sauce and broccoli. Top with cilantro and add peanuts, if desired.

Thai one on with Erin onTwitter at @Erin1217.

0 Comments

VIVA LA FAJITA (or "Wait, What Do You Mean There’s No Cheese?")

11/6/2013

0 Comments


Intrepid new chef, cheese addict, and guest blogger 
Erin Gahagan takes on vegan fajitas.

Picture
I love fajitas. But ordering fajitas at a restaurant is like participating in a piece of performance art. You know it’s showtime when you hear that familiar sizzle coming closer as other patrons part like the Red Sea. Ah yes, here come the seven waiters carrying your fajita order. One with the plate so hot it has an oven mitt on the end, its crackling causing everyone around you to stare; the others with cheese, lettuce, sour cream, salsa, and tortillas. It’s a scene. . .every time.

It never crossed my mind that I could make fajitas at home. Okay, let’s be frank: It never crossed my mind that I could make anything at home. So, flipping through The Vegan Cheat Sheet in search of my next challenge, I spotted a recipe for Vegetable Fajitas (page 98).  Yes, please! The recipe looked simple with basic ingredients.

But wait, was I really considering making fajitas without cheese? I understand that abstaining from cheese is a tenet of veganism, but I am from Wisconsin. More like a clichéd version of someone from Wisconsin—I LOVE CHEESE. I put it on everything I possibly can. I have a unique gift for making super-healthy vegetables wholly unhealthy by adding slices of cheese (baby carrots and cheese slices, yum!). Once, I even put it on a sweet potato (don’t try this—it is not a thing).

Picture
All right, well, one meal without cheese won’t kill me. In fact, it’ll probably be less likely to kill me. So I gathered my fajita ingredients and got to work. First I had to whisk the sauce, a mix of soy sauce and agave syrup. I was skeptical, as it seemed like a weird combination. But (literally) what do I know, so I called upon my rarest quality—patience—and kept going. 

Picture
Prepping the vegetables was a revelation. This was the first time I heard the word “cored” with “bell pepper,” so I looked it up. Turns out the proper way to prepare a bell pepper is to core it like an apple and then scrape out the white pith with a paring knife (bonus, I learned a new word: “pith”). All these years I’d been chopping up peppers and just throwing away pieces with the white stuff. . . er. . .pith. I’ve wasted so many edible peppers!  Ahhh! Ok, moving on…

Picture
Admission: this was my first time slicing an onion. Seriously. I do not like onions, and mentioned, until now I rarely cooked. I simply never found myself in this situation. I was kind of excited, and it turned out to be awesome. Did you know that under those ratty papery outer layers is a pretty onion?! You probably did. Anyway, I felt like I’d unwrapped a present. So I sliced up the onion and waited to cry. Isn’t that what happens when you slice onions? Finally, when I was almost done, my eyes started to sting, and I felt legitimate.

Picture
I threw all my beautiful vegetables and the sauce into a pan and got to sautéing. Fifteen minutes later, I had a pan full of delicious-looking fajita filling. I wrapped it up in a whole-wheat tortilla, restrained myself from adding cheese, and took a bite. Wow.  The sauce created such an explosion of flavor that I didn’t even miss the cheese. Let me repeat that: I DID NOT MISS THE CHEESE.

These Vegetable Fajitas were incredibly tasty and so easy I almost felt like I forgot to do something (I didn’t). And never again will I question what I’m mixing together—that sauce was genius. Amy and Lisa know what they’re talking about!

Picture
But best of all, this fajita dinner requires only one (non-sizzling) serving plate. That chorus line of servers will have to find work elsewhere.  


Share your sizzling stories with Erin on Twitter at @erin1217.    


Vegetable Fajitas
Serves 4

1/2 cup agave nectar or pure maple syrup
1/4 cup tamari or soy sauce
1 large onion, sliced in strips
1 red bell pepper, cored, seeded, and sliced
1 green bell pepper, cored, seeded, and sliced
2 reen zucchinis, sliced
1 cup sliced mushrooms
4 whole-wheat tortillas (burrito size)
  1. Whisk agave nectar and tamari together until well blended.
  2. Place onions, peppers, zucchini, and mushrooms in agave sauce to marinate for 10 to 15 minutes.
  3. in a heavy dry pan, sauté vegetables and sauce on high heat, stirring regularly until vegetables are tender and caramelized, about 10 minutes. if there's excess liquid, remove it from pan and save; you can add it back in later, if desired  Roll mixture inside tortillas like burritos. ¡Buen provecho!
0 Comments
<<Previous

    Archives

    October 2014
    June 2014
    April 2014
    March 2014
    February 2014
    December 2013
    November 2013
    September 2013

    Categories

    All
    Cravings
    Holidays
    Media Appearances
    Recipes
    Tips

    RSS Feed

Website by Visual Media